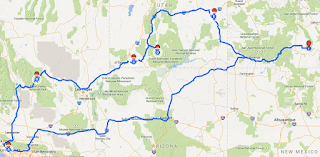
How to add multiple destinations in Google Maps trips
If you’re going on a long journey or planning for a long
trip, with Google Maps, you can check the route as well as add your stops.
Doesn’t matter how you’re traveling, Google Maps allow you to set multiple
destinations. If you want to stop at various places while traveling, you can
add your stops in the Google Maps. Here is how to add multiple destinations or
stops in Google Maps.
How to set multiple destinations in Google Maps app
If you’re using Google Maps app in your mobile for navigation,
then in the app you can set your stops. Process of adding multiple destinations
in the app for both Android and iOS device is the same.
Note: You can’t select multiple destinations for transit or
rides.
1. Start the ‘Google Maps’ app on your
mobile.
2. Tap the blue ‘Go’ button near the
bottom right corner.
3. Tap the ‘Starting Location’ box and
enter a location, pin a location on the map, or select your current location.
4. Tap the ‘Choose destination’ box and
enter your first destination/stop, or pin a location on the map.
5. Select either you’re driving or
walking. Transit and rides don’t support multiple destinations.
6. Tap the ‘dotted’ icon near the starting
point box. This button only appears after selecting the mode (drive or walk) of
traveling.
7. Select ‘Add stop’ from the menu.
8. Now, tap the ‘Add stop’ box just below
to the first destination box.
9. Enter your second destination or
‘choose on map.’
10. When you add a stop a new ‘Add stop’
box comes up.
11. Continue adding your stops.
For a trip, you can set up to nine stops or destinations. If
you didn’t find the ‘Add stop’ in the more options, maybe android version or
your device is too old.
How to set multiple destinations in Google Maps website
If you’re using Google Maps in your laptop or computer, here
is how to add stops in a trip through Google Maps website.
Note: You can’t select multiple destinations for airplanes
or transit.
1. Go to ‘Google Maps’ website.
2. Click the blue ‘Direction’ button next to
the search bar.
3. Select the way of traveling from the
top. Only driving, cycling, and walking supports multiple destinations.
4. Click on starting location box and
enter a location, click a location on the map, or click ‘My location’ for your
current location.
5. Allow Google Maps to access your
location, if asked.
6. Click on ‘Choose destination’ box and
enter your first destination/stop, or choose a location on the map.
7. Click the round ‘+’ button just below
to the first destination you entered. This button only appears after selecting
both the starting point and first destination.
8. Enter your second destination like you
select the first.
9. Use the same procedure to add more (up
to nine) destinations in your trip.
10. Select the route to view directions.
That’s it! If you want to reorder your destination, click and drag the dot of
destinations. If you’re not getting ‘+’ button after selecting your first
destination, check the mode of traveling you’ve selected. Click the ‘Share’ and
‘Print’ icon to share or print your route.
Edward Lewis is a Microsoft Office expert and has been
working in the technical industry since 2002. As a technical expert, Edward has
written technical blogs, manuals, white papers, and reviews for many websites
such as office.com/setup.


Comments
Post a Comment